Hiking is the only way to see much of the world. Believe it or not, much of the world lacks paved roads. You can explore areas without another soul being within 100 miles of you. This can make you feel very remote and desolate despite the world sometimes feeling crowded. You can see the sunset amidst the mountains that act as islands amidst a sprawling cloud ocean. There is much of the world to explore, but to do that, you might have to get off the trail and embrace more advanced skills you may have used when you first started hiking. Let’s break some of those down and help build a decent understanding of how hiking opens up. Let’s explore how to prepare for the world of intermediate hiking.
Note that some of the material may assume you’ve been through our beginner’s guide to hiking! Be sure to check it out!
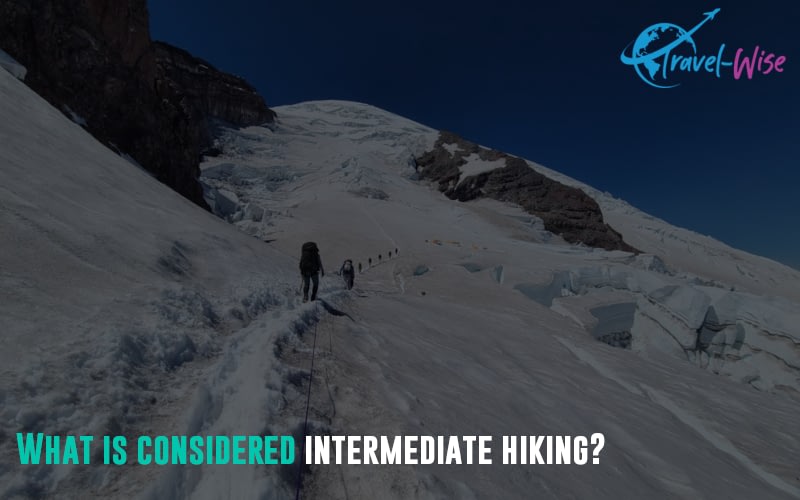
What is considered intermediate hiking?

I consider intermediate hiking to be anything that goes off the trail. Also, multi-day hikes are not for beginners. The trail will have some hazards that present a risk of injury or death. This is true when the hiker lacks the skills or tools to reduce the danger.
Hiking has started to diversify. Different kinds of hiking need different strengths, skills, and experiences. So, some of these subcategories include scrambling, backpacking, trail running, and climbing on glaciers. The advanced categories include ultra backpacking and ultra trail running. They also include rock & ice climbing and high-altitude mountaineering.
Intermediate hikes are harder than beginner trails. They have tougher terrain and are longer. Intermediate hikes often involve:
- Longer distances, typically ranging from 5 to 10 miles (8 to 16 km)
- Significant elevation gains, usually between 1,000 to 3,000 feet (300 to 900 meters)
- Moderately rugged terrain, such as rocky paths, steep inclines, and uneven surfaces
- Exposure to varying weather conditions and environments
Intermediate hikes do not need climbing skills. But, they do need more fitness, endurance, and preparedness than beginner hikes.
Key differences from beginner hikes:
- Increased intensity and duration of physical exertion
- Greater navigational skills are required to follow trails and read maps
- Higher risk of injury or getting lost if unprepared
- More exposure to potential hazards like wildlife encounters or rapidly changing weather
Intermediate hikes often go through more remote and tough landscapes. These include mountains, dense forests, and exposed ridgelines. These hikes can last several hours or even a whole day. They need proper planning, gear, and mental strength.
To ensure a safe and enjoyable experience on an intermediate hike, hikers should:
- Gradually build up their fitness levels through training
- Invest in appropriate hiking gear and equipment
- Develop navigation and wilderness skills
- Plan and research their routes thoroughly
- Understand and respect the principles of Leave No Trace
Understanding the Difficulty of Paths & Routes
Note that I use “paths” to mean a clear boot path. I use “route” to mean a general guideline where to go. A route may need self-navigation, planning, and skill to keep from getting off route or lost. A route could use a path, or it can be off-path. With this established, different parts of the world may classify the risks differently. I will use the USA version of the “Yosemite Decimal System.” I am used to it and think it summarizes the danger classes well.
Now, let’s talk about “difficulty.” People often talk about challenging hikes as being strenuous. We need to clarify two ways to classify paths and routes. First, strenuousness tells you how fit you need to be. It’s to overcome the challenges on the trail. Then there is technical, which we will get into next. There is no clear way to break down a trail’s physical requirement. But, apps like All Trails and others try to rate a trail’s difficulty by how strenuous it is.
Technical Ratings

It is a six-class system in total. A path our route should use the class that describes its hardest section. If a hike is mostly easy but has one tiny, dangerous section, the whole trail gets the rating of that section. This happens if the dangerous part cannot be avoided. What matters is the class system does not describe how hard a route might be. It describes the danger you will encounter on it.
- Class 1: A route is not steep enough to use your hands. Minimal risk is other than trip hazards.
- Class 2: A route that is a bit steeper. You may need to use your hands here and there. There is a low risk of injury if you fall.
- Class 3: A route with scrambling (unroped climbing). Includes steep terrain that could be snow or rock. If you fall, there is a low risk of death and a high risk of injury.
- Class 4: A steeper scramble route may have short, exposed climbs and unstable ground. If you fall here, there is a high chance of death. A rope is advised for descending, and helmets should be taken to protect against falling rock and ice.
- Class 5: A full vertical face that runs over a long stretch in which a fall is guaranteed death. The only way to reduce class 5 risk is to bring a rope team. You need proper tools to make a route with the rope. And you need skills to keep the route as a team. You can accept the risk and choose not to mitigate it as a solo climber. Class 5 requires much preparation and skill to surmount. It is further broken down into subcategories, from 5.4 to 5.14.
- Class 6: You don’t see this pop up anywhere usually, but it means the route is naturally unclimbable.
These ratings can help you pick trails. They should match your abilities and the challenge you want.
Reading trail descriptions and maps
In addition to ratings, read trail descriptions and study maps. This is essential. Trail descriptions often provide valuable insights, such as:
- Terrain characteristics (rocky, forested, exposed, etc.)
- Potential obstacles (stream crossings, steep sections, etc.)
- Points of interest along the route
Maps, on the other hand, offer a visual representation of the trail, including:
- Elevation profiles
- Distances between landmarks
- Topographic features and landmarks
Study these resources carefully. You can then better predict the challenges you may face. And you can make informed decisions about your hike.
Elevation gain and terrain challenges
Two key factors can greatly impact an intermediate hike’s difficulty. They are:
- Elevation gain: Trails with lots of elevation gain need more effort. They can be tough on your heart and legs.
- Terrain characteristics: Rocky or uneven surfaces need more stability and balance. Exposed or narrow sections may make some hikers feel exposed or dizzy.
SummitPost.org is an excellent source for finding the technical classification for known routes in many mountains.
Understanding Your Physical Capabilities
Hiking quickly becomes a massive world for fitness junkies. You may dream of setting an FKT on a trail. Or, you could hike the Pacific Crest Trail. You could catch the sunset on a local mountain ridge or climb Denali. These challenges will push you to your limit and show the world new limits for what people can do. However, you must be prepared and know your limits. You don’t just jump into these things. Training and preparing with a core mindset will help you keep progressing. It will also help you enjoy your time outdoors.
People often become desperate and tired when they get hurt or make mistakes. They’ve surpassed their physical bar and failed to assess their limits properly. As a result, they get wobbly and sometimes risk their own lives and those of others around them. Creating a high fitness bar for yourself is vital before you embark on challenges. Acknowledging this is a critical step. Then, you can make a workout regime and a plan to improve your health.
As with all things, data and metrics are the only way to know if you are improving. A simple stopwatch will do. Time yourself to finish a tough hike. Then, do it again and again to get faster. Finding ways to break the time might be harder when you start to plateau, but that’s a good problem. Going this far, you are good enough for most intermediate hiking.
Before starting harder hikes, you must honestly assess your current physical abilities. This self-awareness will improve your hiking experience. It will also keep you safe on the trails. Here’s what you need to consider:
Assessing your current fitness level
- Cardiovascular endurance: Can you sustain prolonged periods of physical activity without excessive fatigue?
- Muscular strength: Do you have enough leg, core, and upper body strength? It’s needed for steep inclines and rough ground.
- Flexibility: Are you flexible enough? Can you keep proper form and avoid injury during hard activities?
Building endurance and strength
- Cardiovascular exercises: These activities include running, cycling, and swimming. They will improve your aerobic capacity.
- Do strength training. Focus on exercises for your leg muscles, core, and upper body. It will increase your stability and strength on the trails.
- Hiking-specific training: Train for hiking with specific training. Do this by gradually increasing the hike distance and difficulty. Carry a weighted backpack to simulate the added load.
Gradually increasing your mileage
- Start with shorter hikes and gradually increase the distance over time.
- Incorporate elevation gains into your training to prepare for more strenuous terrain.
- Listen to your body and adjust your pace or distance as needed to avoid overexertion.
- Allow for proper recovery time between longer or more intense hikes.
Understanding The Safety Tools And Your Comfort To Address Safety Risks
Uncomfort tends to be a sign of a situation you have not prepared or practiced enough for. With that in mind, you should love the hiking journey and the places you can see, smell, and fully enjoy yourself in. You will naturally decide when and where your comfort zone is. Intermediate hiking has risks. They could cost your life or the lives of the people you care for. Acknowledging the risks is important. So is drawing the line between how far you go and the subcategory I mentioned?
That said, tools and your ability to use them well will keep you alive in real wild emergencies. I won’t get into details on all the tools and tricks of the trade in this article, as that can justify a book of information. However, some standard tools are both common and highly situational. They include ice axes and crampons. They also have helmets and snowshoes. They also have ropes and climbing harnesses. They have belay devices, snow shovels, and avalanche beacons. The list gets much longer as it gets into the advanced zone.
I understand these are tools for more than just comfort and are meant to mitigate real risks. You should practice using them. You should feel comfortable with them before the day you need them to save your life. You can learn many of these skills from courses or from others. They have already experienced them.
Taking Care Around Wildlife
Just one note about wildlife to help prepare you for intermediate hiking. Once you get off the trails that feel like highways for hikers, you will start seeing more animals. Animals tend to keep a distance from popular trails, generally. With this in mind:
- Most animals will be shy and keep their distance.
- Some will be curious and take an interest in your presence.
- Others won’t care as long as you maintain a respectful distance.
- However, some animals are territorial. If you encroach on their territory to capture a selfie, they could see you as a threat.
You must research a select few animal predators. They may be local to the areas where you hike. These tend to be a more significant concern, but all predators are opportunistic. To minimize the risk:
- Keep aware of your surroundings and appear capable.
- If you have children or are shorter, surround them with adults or taller people.
- Stay grouped. Animals will see this as a bigger threat and less opportunity.
- Continue to appear capable and intimidating, and most predators will leave you alone.
Many of the dangerous, sneaky predators hunt at night. Be careful when hiking in the forest after dark.
When it comes to food and scents:
- Never sleep with anything with a strong scent near you in the forest or lowlands.
- Bring a bag and a small rope to sling the bag into a tree, or bury the food away from your campsite.
- The scent will attract many small animals, and potentially even larger ones.
I have hiked all over the world, from Patagonia to the USA, Canada, Mexico, and Iceland. I have never needed a whistle, gun, or weapon to protect myself from animals. I advise:
- Be curious and observe wildlife from a safe distance.
- Respect nature, and nature will respect you.
- Keep that love of nature at heart, as you are no longer in a human-optimized habitat.
Intermediate hiking is rewarding and thrilling. It opens up a world of stunning landscapes and remote adventures. You can go on harder hikes confidently and preparedly. You just need to get fit, learn skills, and have the right gear. Remember to respect nature, be mindful of potential hazards, and always prioritize safety. Plan well. Enjoy the adventure. The wild outdoors are waiting for you.
Now you’re ready for intermediate hiking. Explore some itineraries and find a great spot. If you still have questions or want tips, join our community. You’ll find other hiking enthusiasts there.

